
The Little Mermaid's syntax colors - creating a themed palette
Graphic design students often learn that color palettes can be extracted from any visual source. Photographs, Illustrations and any visual reference can be used to sample colors. We will use this technique here to create a visually-compelling and coherent syntax-highlighting color palette.
A few days ago, after I wrote about syntax color palettes, a friend reminded me that we used to have a syntax-color palette at work that I always referred to as being the little mermaid palette. I will try to recreate that palette in this tutorial.
During the tutorial, we'll extract a color pallete from a source image using Illustrator and then use Visual Studio 2003 to create a syntax highlighting pallete that matches the one we extracted. Let's get started.
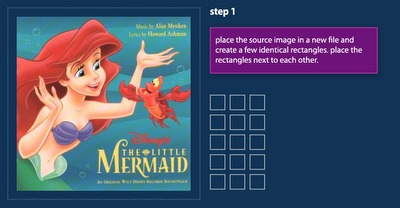 Step 1: find a source image on the net and place it inside an illustrator document. draw a few matching rectangles and place them next to each other.
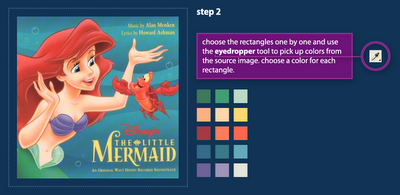 Step 2: Choose the rectangles one by one and use the eyedropper tool to pick up colors from the source image. Try to create a pallete that represents the primary colors of the source image.
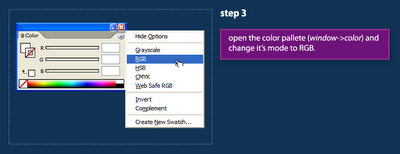 Step 3: Open Illustrator's Color palette (Window Menu->Color) and set its color mode to RGB.
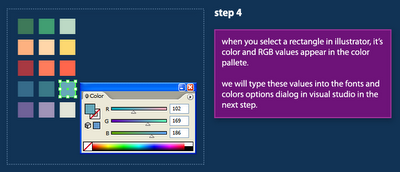 Step 4: The Color palette displays colors of the selected shape. We will use this window in the next steps to copy the RGB values of our colors into Visual Studio.
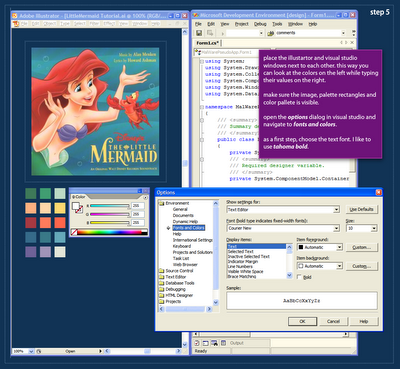 Step 5: After we've created a palette in Illustrator, we're ready to start applying this palette to actual code syntax in Visual Studio. Open Visual Studio and place the Illustrator and Studio windows next to each other (see image above). This placement will make it easier for us to copy the color values to Visual Studio. As a first step, we'll choose the text font. I use Tahoma Bold for all my syntax palettes.
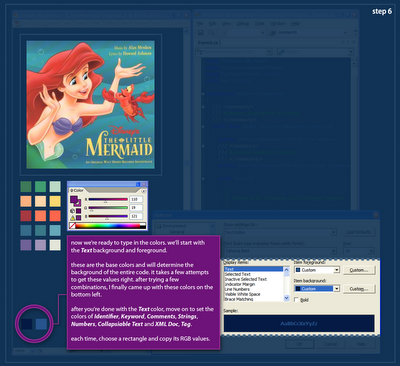 Step 6: In order to apply the palette to the syntax colors in Visual Studio, we have to select each syntax element and assign the RGB values from the palette rectangles. We will start with the Text element because it determines the background of the entire palette. The Text colors are kind-of hard to get right, and you might need a few attempts to get those to work. When you think you can move on, start setting colors for the Identifier, Keyword and Comment elements. then click Ok. after settings those basic elements you could probably see if your palette is heading in a good direction. Continue on to define the Strings, Numbers, XML Doc & Tags and Collapsible Text.
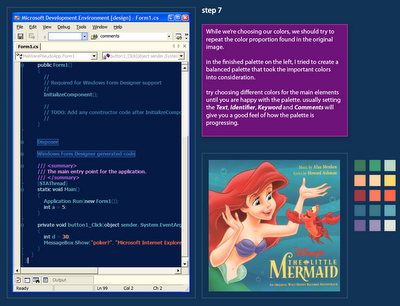 Step 7: This is a screen-capture of the palette I created after quite a lot of playing around. I was trying to preserve the feel of the illustration, although I did not use the exact color proportion. The result is a coherent syntax coloring palette that would be very hard to accomplish without a visual reference.
Visual Studio 2003 does not have a palette export feature, but you can use regedit to export the FontsAndColors group to back up your syntax palette.
My Little Mermaid palette is available for download: here.
Update: a massive emacs syntax highlighting gallery: Link
A few days ago, after I wrote about syntax color palettes, a friend reminded me that we used to have a syntax-color palette at work that I always referred to as being the little mermaid palette. I will try to recreate that palette in this tutorial.
During the tutorial, we'll extract a color pallete from a source image using Illustrator and then use Visual Studio 2003 to create a syntax highlighting pallete that matches the one we extracted. Let's get started.
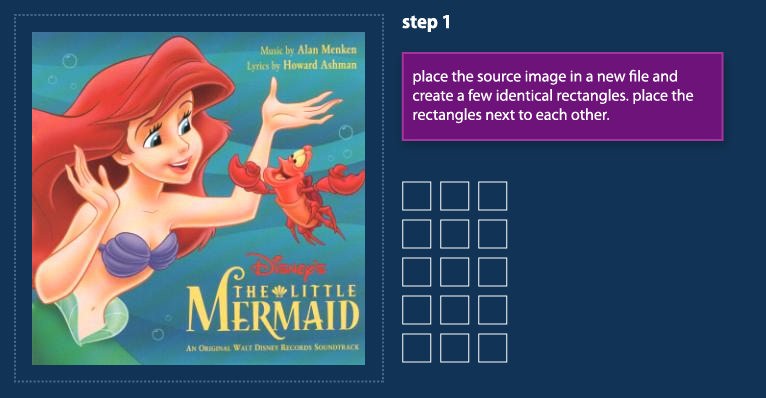 Step 1: find a source image on the net and place it inside an illustrator document. draw a few matching rectangles and place them next to each other.
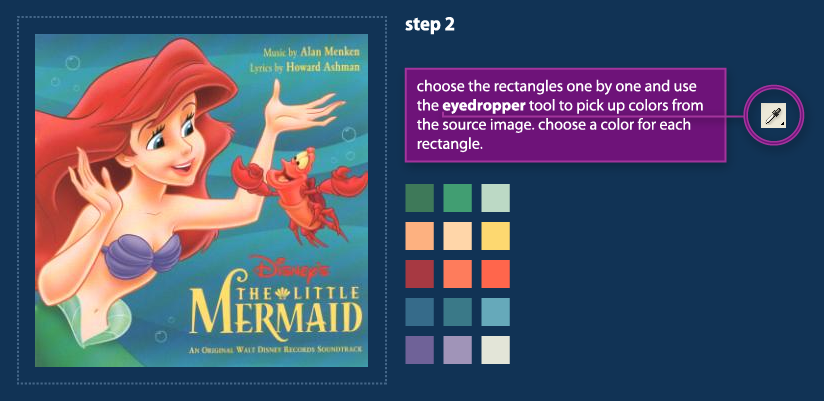 Step 2: Choose the rectangles one by one and use the eyedropper tool to pick up colors from the source image. Try to create a pallete that represents the primary colors of the source image.
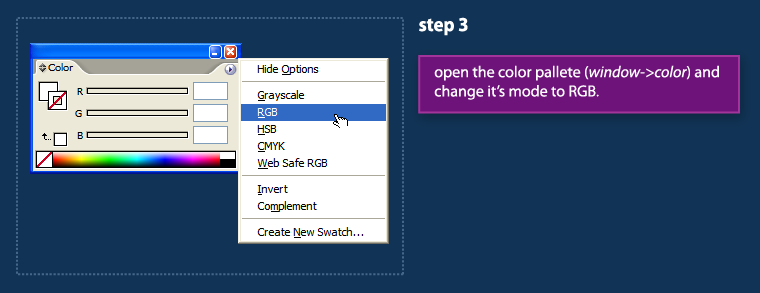 Step 3: Open Illustrator's Color palette (Window Menu->Color) and set its color mode to RGB.
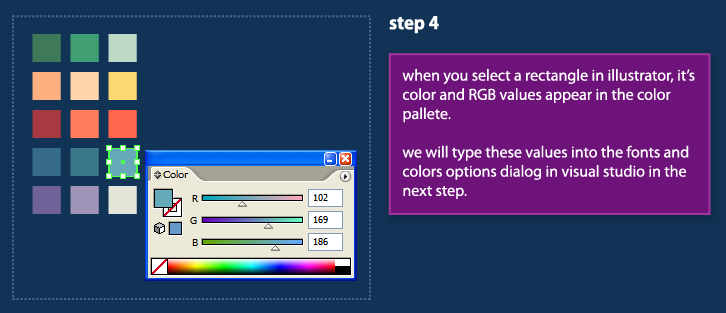 Step 4: The Color palette displays colors of the selected shape. We will use this window in the next steps to copy the RGB values of our colors into Visual Studio.
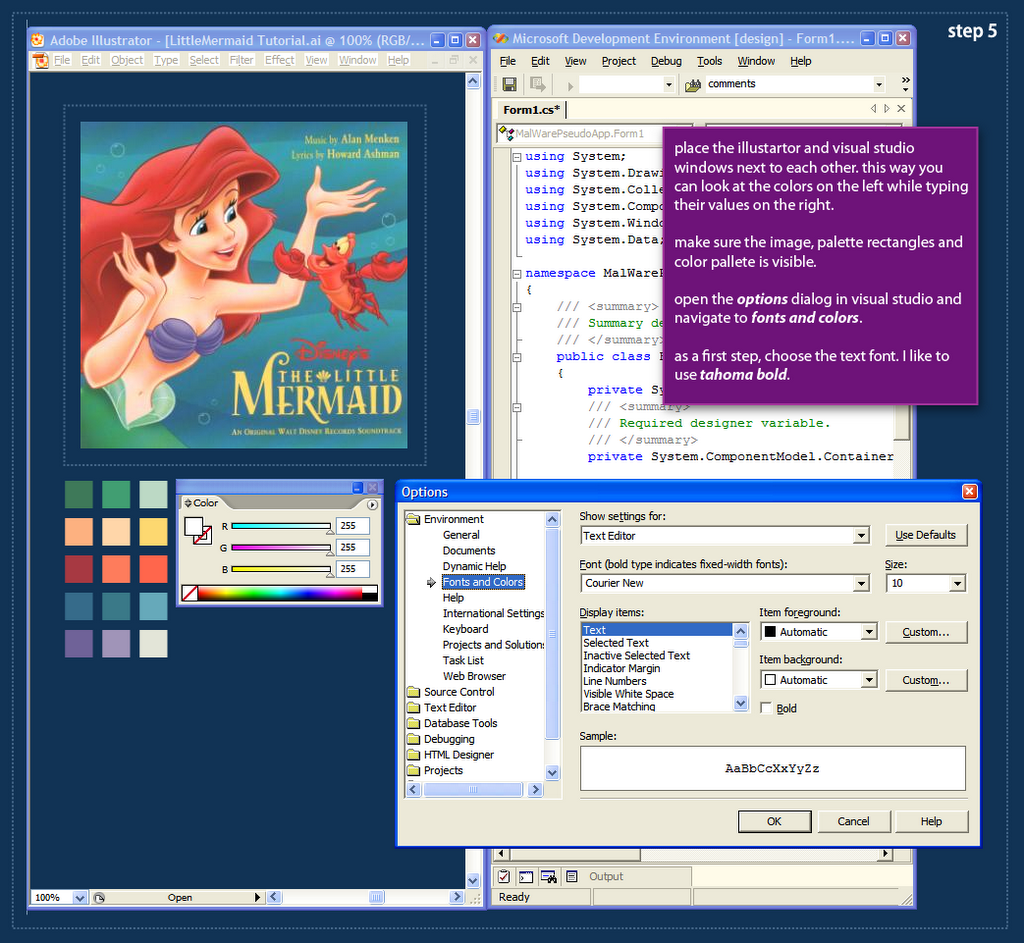 Step 5: After we've created a palette in Illustrator, we're ready to start applying this palette to actual code syntax in Visual Studio. Open Visual Studio and place the Illustrator and Studio windows next to each other (see image above). This placement will make it easier for us to copy the color values to Visual Studio. As a first step, we'll choose the text font. I use Tahoma Bold for all my syntax palettes.
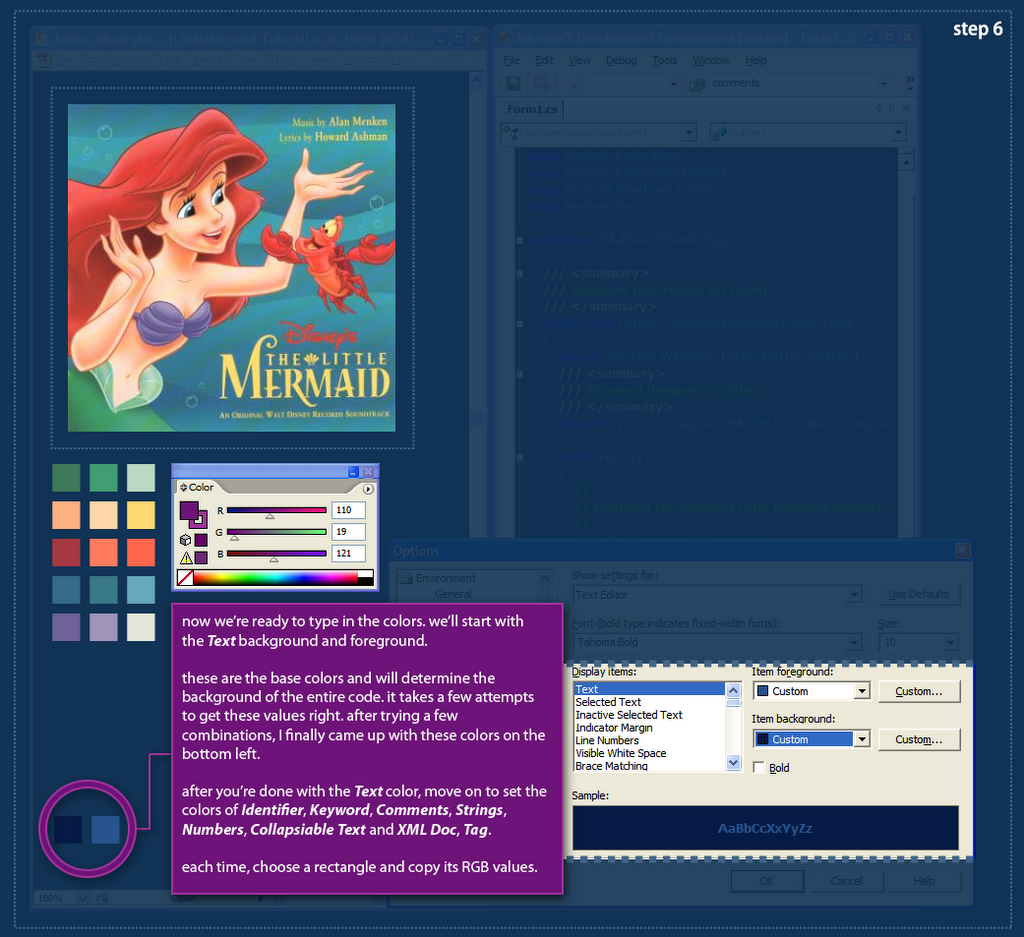 Step 6: In order to apply the palette to the syntax colors in Visual Studio, we have to select each syntax element and assign the RGB values from the palette rectangles. We will start with the Text element because it determines the background of the entire palette. The Text colors are kind-of hard to get right, and you might need a few attempts to get those to work. When you think you can move on, start setting colors for the Identifier, Keyword and Comment elements. then click Ok. after settings those basic elements you could probably see if your palette is heading in a good direction. Continue on to define the Strings, Numbers, XML Doc & Tags and Collapsible Text.
 Step 7: This is a screen-capture of the palette I created after quite a lot of playing around. I was trying to preserve the feel of the illustration, although I did not use the exact color proportion. The result is a coherent syntax coloring palette that would be very hard to accomplish without a visual reference.
Visual Studio 2003 does not have a palette export feature, but you can use regedit to export the FontsAndColors group to back up your syntax palette.
My Little Mermaid palette is available for download: here.
Update: a massive emacs syntax highlighting gallery: Link
Labels: colors, dotnet, graphicdesign, illustrator, syntaxcoloring, tutorial, visualstudio
posted by Guy at 02:36

 Hebrew Blog
 Subscribe to this blog's feed