Howto: create vector application mockups using Visio & Illustrator
Visio 2003 is a great tool for creating mockups of Windows XP user interfaces. It features a complete stencil that includes many common windows control that were re-drawn as Visio vector shapes.
However, by itself, Visio isn't always sufficient for creating an entire, detailed application mockup. such mockups often require graphics that are hard to produce on Visio alone.
This quick tutorial will show you how to create a detailed vector mockup using both Visio and Adobe Illustrator.
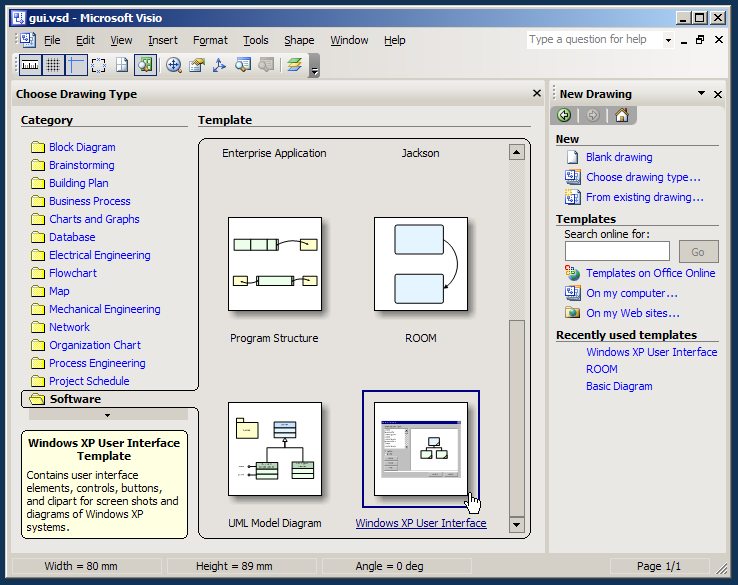
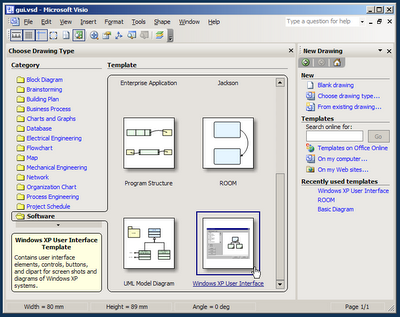 When you first start Visio, the Choose Drawing Type screen appears. choose the Windows XP User Interface drawing type from the Software catagory.
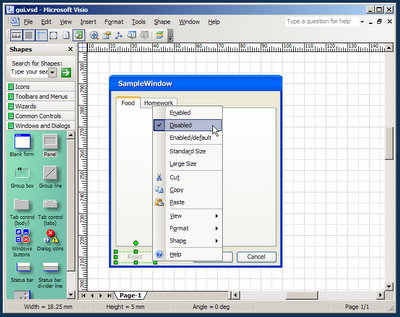 Design your application form using the common controls and shapes found in the stencils on the left. Drag a form first, followed by some buttons and panels. Note: most controls have options that can be set using the context menu.
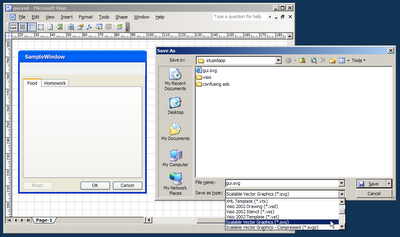 Goto File->Save As and save your file as a SVG file. SVG stands for "Standard Vector Graphics". it's a file format used by many vector graphics applications to exchange drawings. We will open this file with illustrator for further editing. Copying and Pasting the contents of your mockup from Visio to Illustrator might seem quicker, but it doesn't produce well-organized results. (it seems to create redundant, inaccurate shapes.)
 Open the .SVG file with Adobe Illustrator and edit it further. add some special graphics that could not be done in Visio. (here, I added a 3d pie chart and some quick toolbar icons). When initially opened, the file's content might be over-grouped, select your mockup form and hit Ctrl+Shift+G (Ungroup shortcut) until the mockup is completely un-groupped so you can work with it. You can also add another layer above the mockup and lock the layer holding the mockup for easier editing.
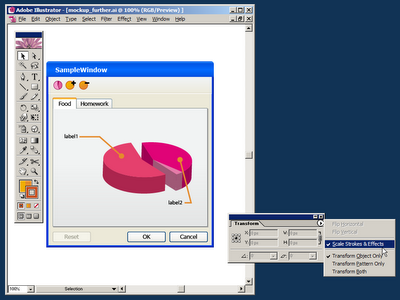 When you're done working on the mockup in Illustrator and ready to use it in another vector file (a Campaign Poster, in my case), make sure the Scale Strokes and Effects option is checked. (this option can be found in the Transform window - open it from Window->Transform.) when turned on, this option tells Illustrator to scale the line strokes and effects applied to each shape. It then allows the scaling of our mockup into any size, without damaging and line work or quality.
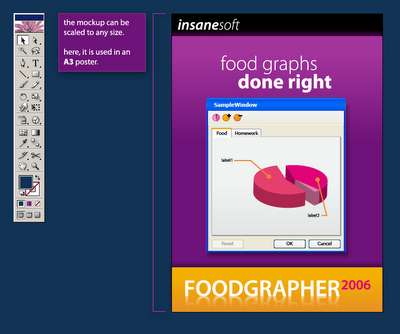 Finally, place the finished mockup into your desired vector drawing, scale it (proportionally - holding Shift) into the desired size. In the screenshot above I've used my mockup in an A3 sized poster.
Great work. We've just created a resolution independent mockup of our imaginary app. We can now make versions of it for our website, posters and T shirts.
However, by itself, Visio isn't always sufficient for creating an entire, detailed application mockup. such mockups often require graphics that are hard to produce on Visio alone.
This quick tutorial will show you how to create a detailed vector mockup using both Visio and Adobe Illustrator.
 When you first start Visio, the Choose Drawing Type screen appears. choose the Windows XP User Interface drawing type from the Software catagory.
 Design your application form using the common controls and shapes found in the stencils on the left. Drag a form first, followed by some buttons and panels. Note: most controls have options that can be set using the context menu.
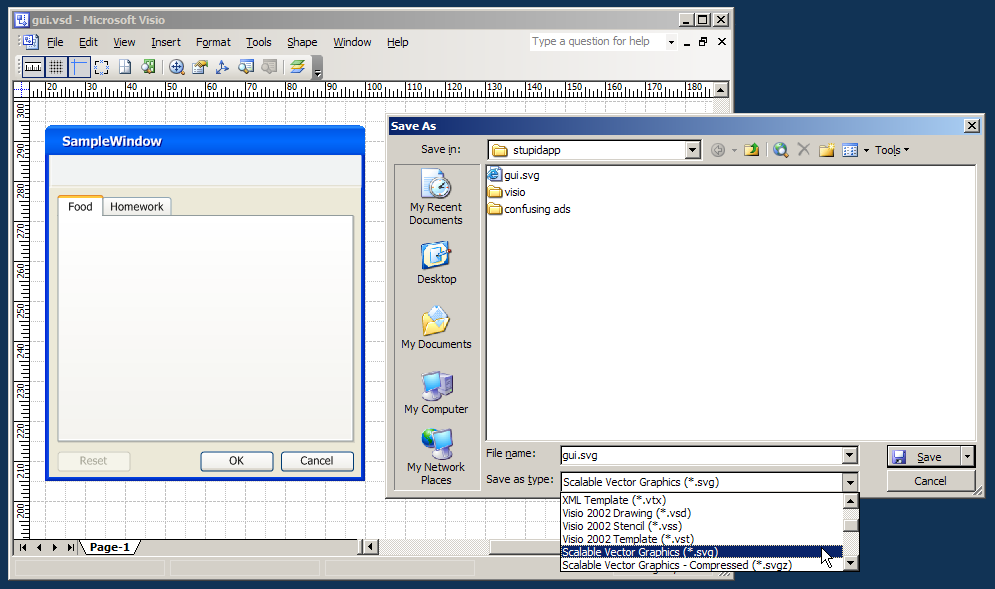 Goto File->Save As and save your file as a SVG file. SVG stands for "Standard Vector Graphics". it's a file format used by many vector graphics applications to exchange drawings. We will open this file with illustrator for further editing. Copying and Pasting the contents of your mockup from Visio to Illustrator might seem quicker, but it doesn't produce well-organized results. (it seems to create redundant, inaccurate shapes.)
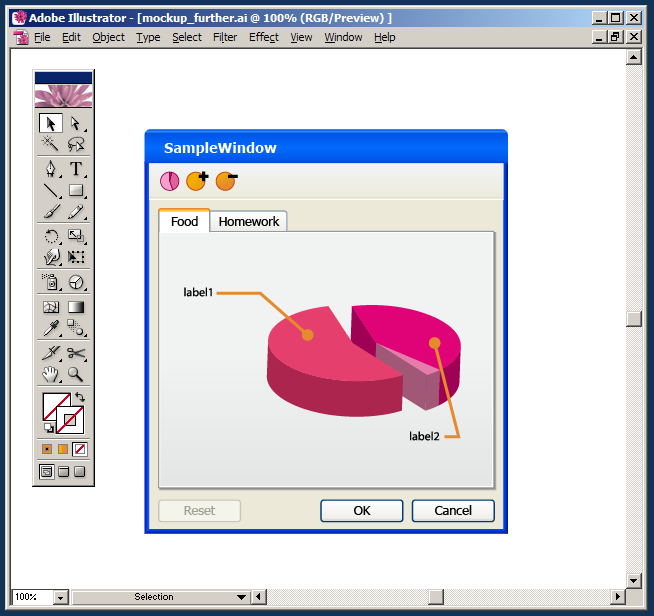 Open the .SVG file with Adobe Illustrator and edit it further. add some special graphics that could not be done in Visio. (here, I added a 3d pie chart and some quick toolbar icons). When initially opened, the file's content might be over-grouped, select your mockup form and hit Ctrl+Shift+G (Ungroup shortcut) until the mockup is completely un-groupped so you can work with it. You can also add another layer above the mockup and lock the layer holding the mockup for easier editing.
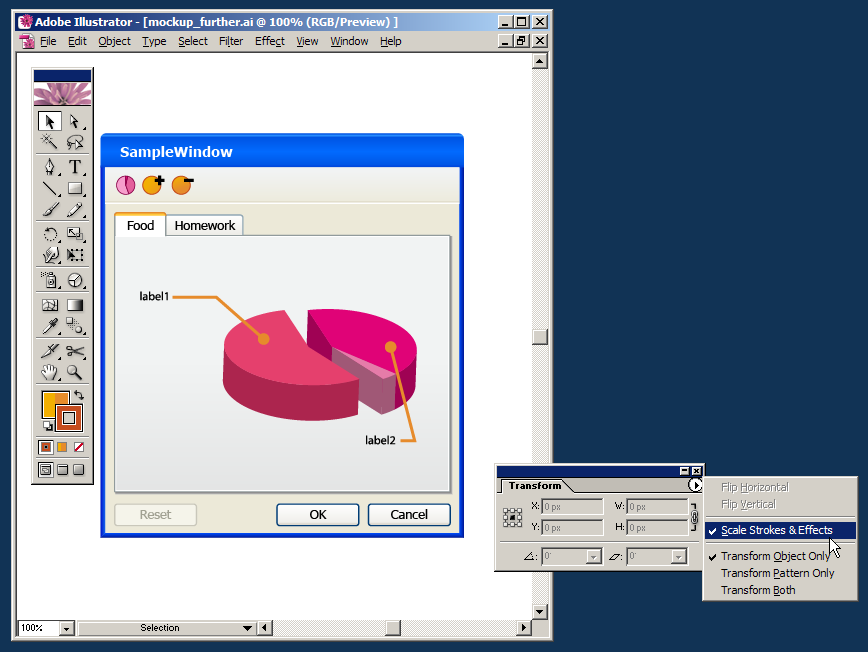 When you're done working on the mockup in Illustrator and ready to use it in another vector file (a Campaign Poster, in my case), make sure the Scale Strokes and Effects option is checked. (this option can be found in the Transform window - open it from Window->Transform.) when turned on, this option tells Illustrator to scale the line strokes and effects applied to each shape. It then allows the scaling of our mockup into any size, without damaging and line work or quality.
 Finally, place the finished mockup into your desired vector drawing, scale it (proportionally - holding Shift) into the desired size. In the screenshot above I've used my mockup in an A3 sized poster.
Great work. We've just created a resolution independent mockup of our imaginary app. We can now make versions of it for our website, posters and T shirts.
Labels: design, gui, guide, howto, illustrator, mockup, tutorial, ui, visio
posted by Guy at 03:44
![]()
 Hebrew Blog
 Subscribe to this blog's feed
<< Home